Installing Lavender for Outlook for Mac
Инструкция от Lavender по установке расширения для Outlook на Mac. Поддерживаются Windows 11 Office 365 и Mac OS Ventura; тарифы Business Basic не поддерживают надстройки — нужен Microsoft Business Standard и выше. Установка выполняется через New Mail → три точки → Get Add-ins → My add-ins → добавление пользовательской надстройки из .xml-файла, который можно скачать на странице. После установки надстройку рекомендуется закрепить через customize toolbar перетаскиванием. Также описана процедура удаления через Get Add Ins → My add-ins → Custom add-ins → три точки → Remove. Указано, что .xml-файл работает только с New Outlook, и для команд администраторы могут использовать массовое развёртывание.

Installing Lavender for Outlook for Mac
Установка Lavender для Outlook на Mac
You can install Lavender on your Outlook desktop app. 🎉
Вы можете установить Lavender в десктопное приложение Outlook. 🎉
Versions of Outlook that support custom add-ins include:
Версии Outlook, поддерживающие пользовательские надстройки:
Windows 11 Office 365Mac OS Ventura
💡 Note:
💡 Примечание:
Business Basic не поддерживает надстройкиНадстройки для Outlook Desktop поддерживаются только на тарифах Microsoft Business Standard и выше
Need help removing the add-in? Check out: Uninstalling the add-in
Нужна помощь с удалением надстройки? Смотрите: Удаление надстройки
If you're an Admin, try adding your whole team through an admin deploy.
Если вы администратор, попробуйте добавить всю команду через admin deploy.
Mac OS
Mac OS
Step 1: Open Outlook and navigate to New Mail
Шаг 1: Откройте Outlook и перейдите к New Mail

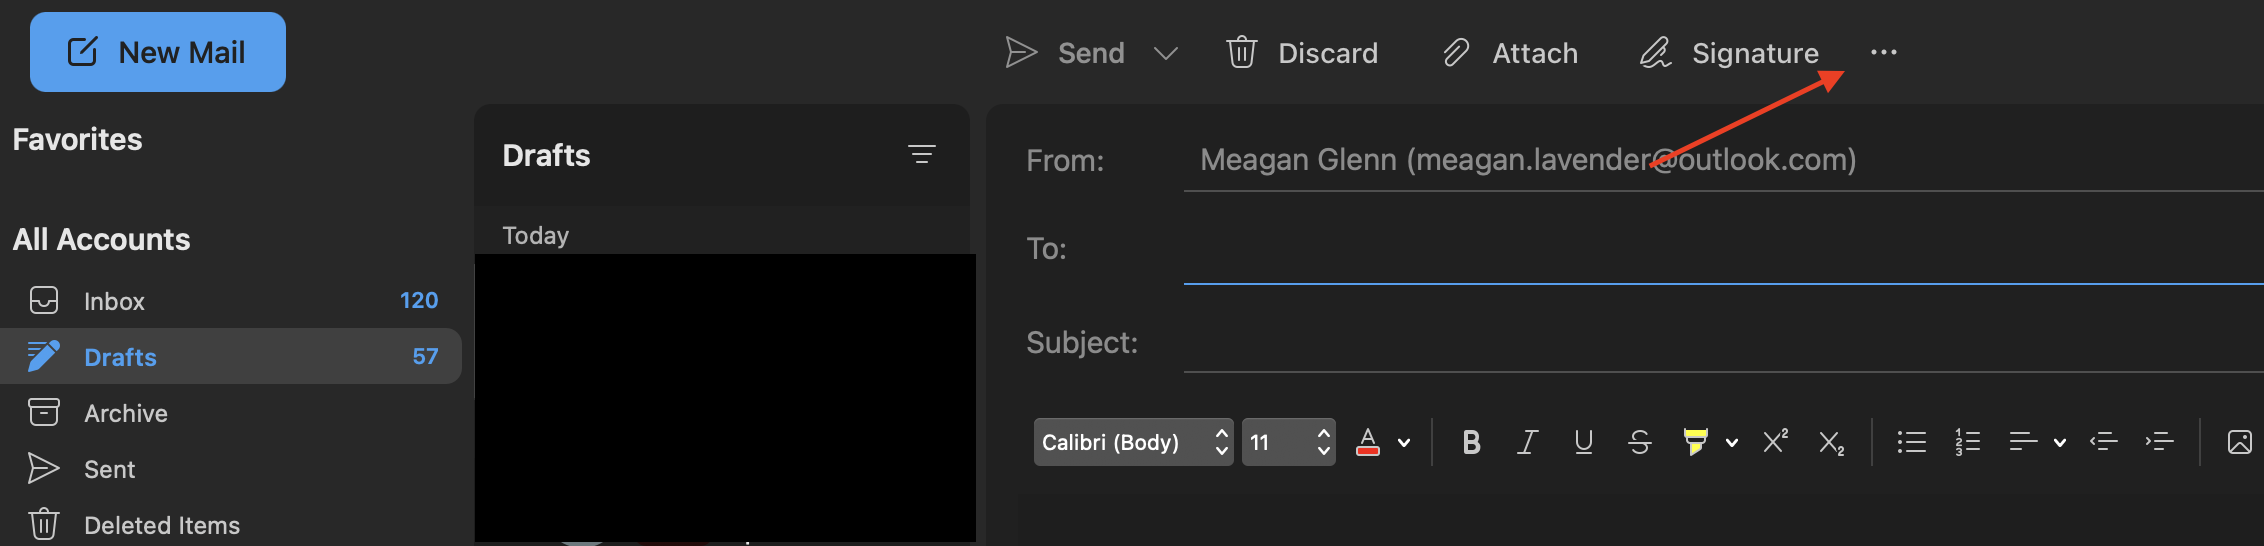
Step 2: Click on the three dots
Шаг 2: Нажмите на три точки
Step 3: Click "Get Add-ins" > "My add-ins" > "add a custom add-in" > "add from file"
Шаг 3: Нажмите "Get Add-ins" > "My add-ins" > "add a custom add-in" > "add from file"
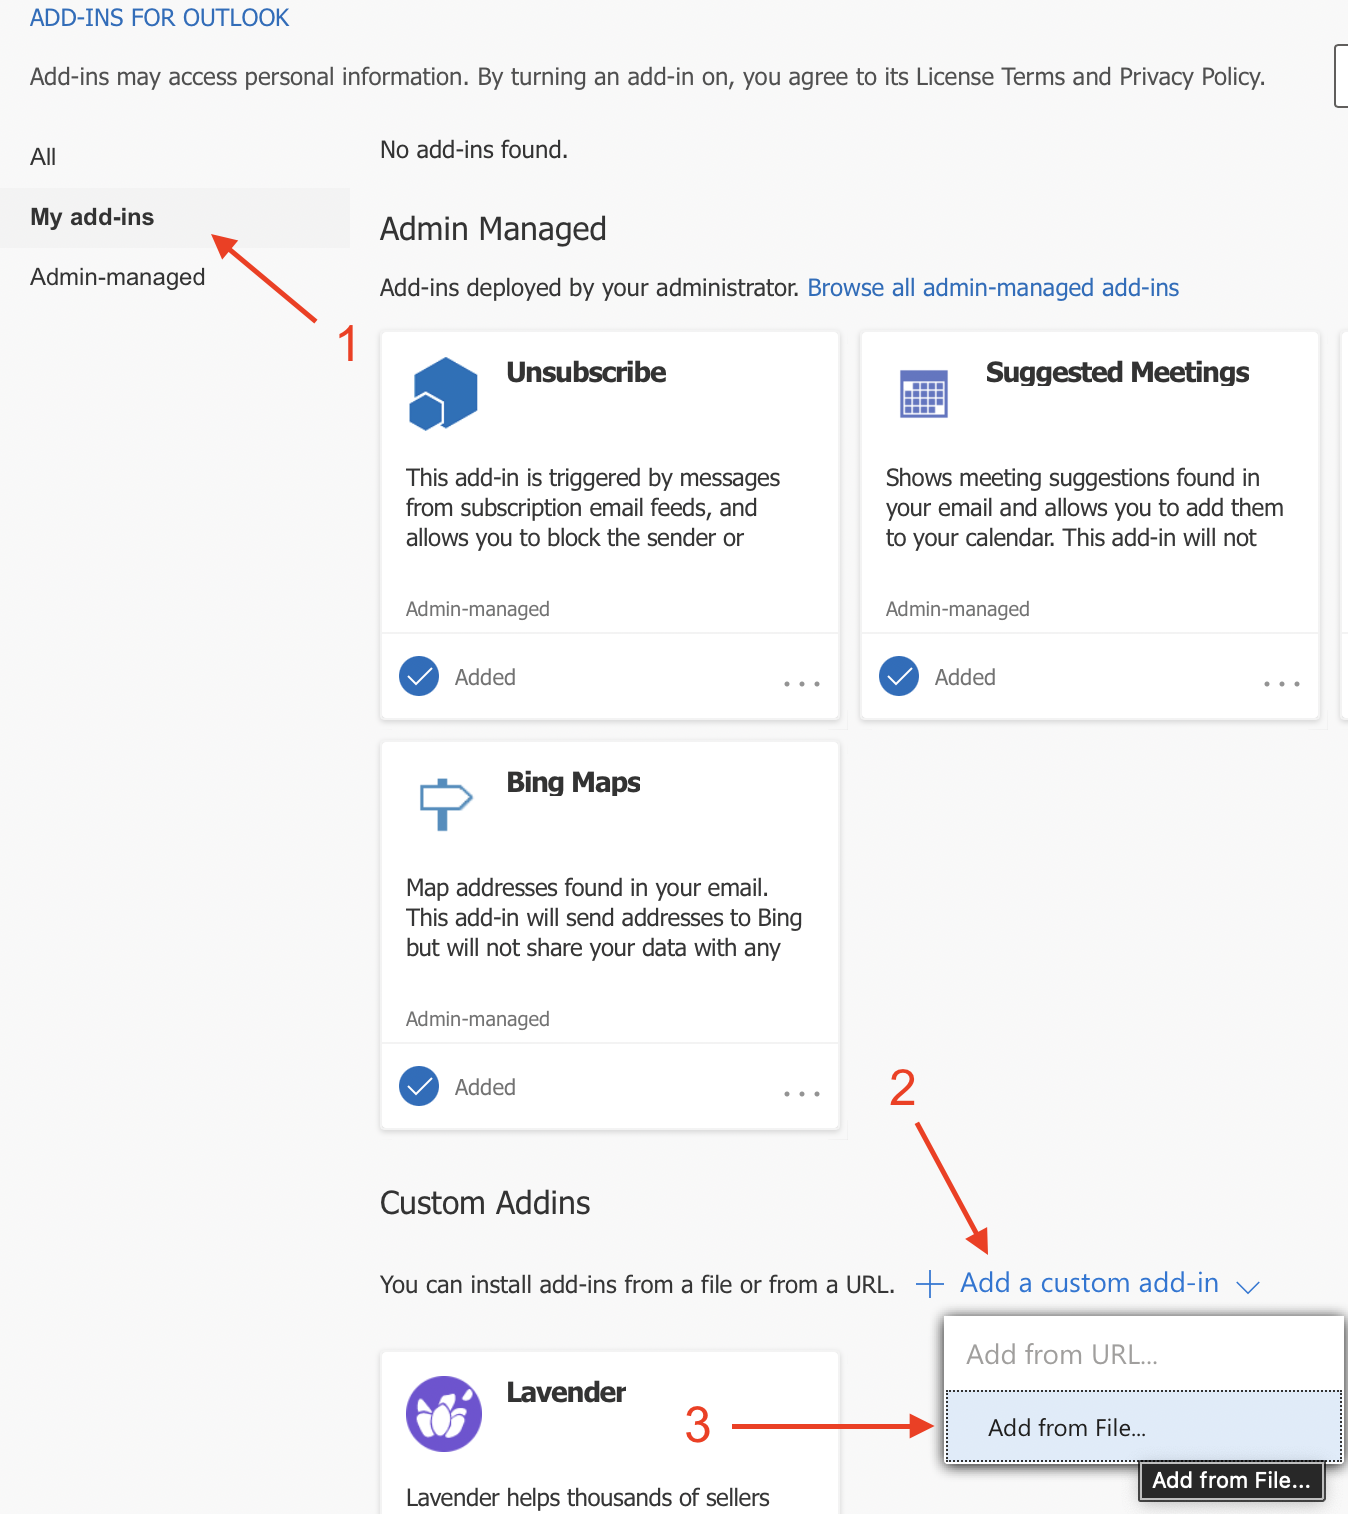
Step 5: Download the Outlook integration .xml file and add the file
Шаг 5: Скачайте .xml-файл интеграции Outlook и добавьте файл
You can find the file at the bottom of this page or by clicking here.
Вы можете найти файл внизу этой страницы или по этой ссылке.
You will then get the option to select "Install."
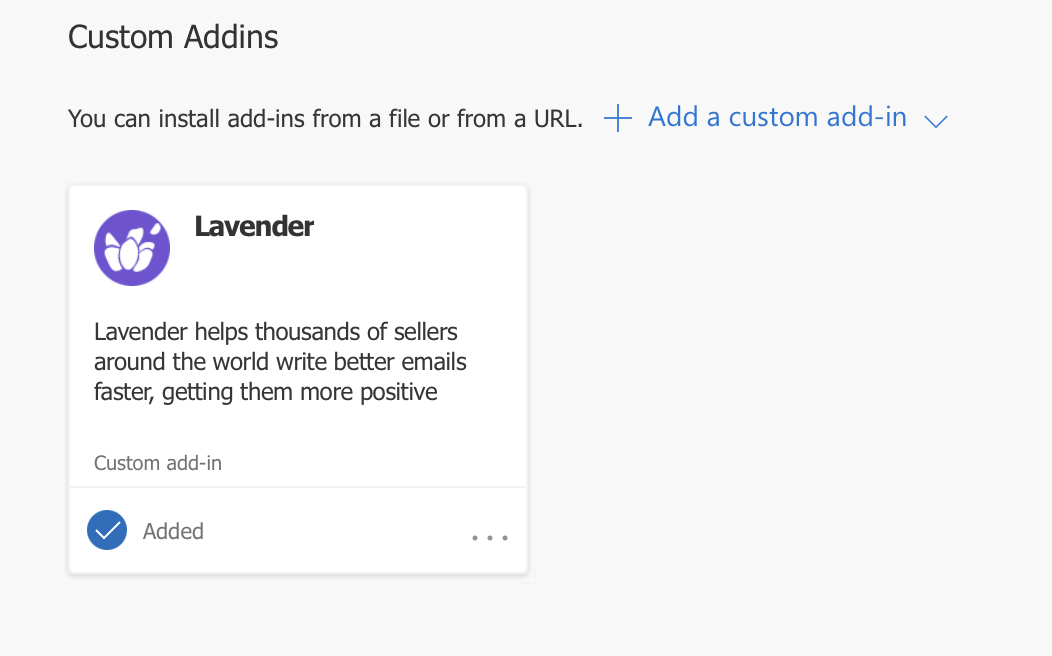
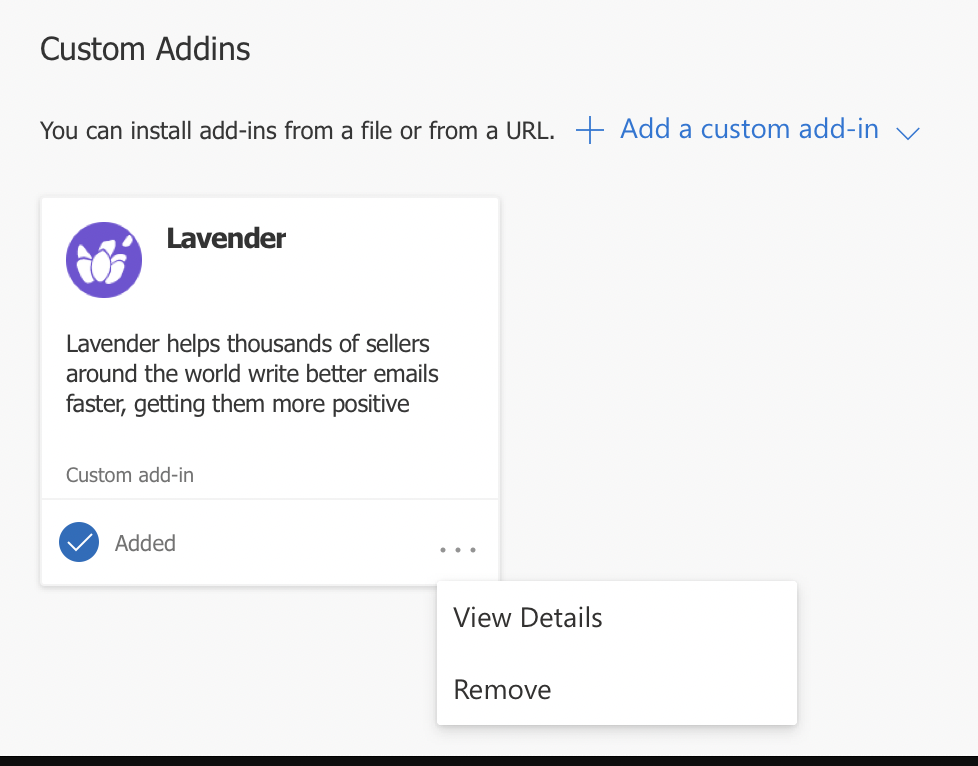
You should click Install and see Lavender under your custom add-ins!
Затем вам будет предложено выбрать "Install."Нажмите Install — и вы увидите Lavender в разделе пользовательских надстроек!
Step 6: Pinning the add-in
Шаг 6: Закрепление надстройки
You will need to have a new email opened for this step
Для этого шага у вас должно быть открыто новое письмо
You will need to have a new email opened for this step
Для этого шага у вас должно быть открыто новое письмо
Once you install the add-in, you'll want to pin it for easy access.
После установки надстройки её стоит закрепить для быстрого доступа.
First, click the 3 dots > click customize toolbar
Сначала нажмите 3 точки > выберите customize toolbar
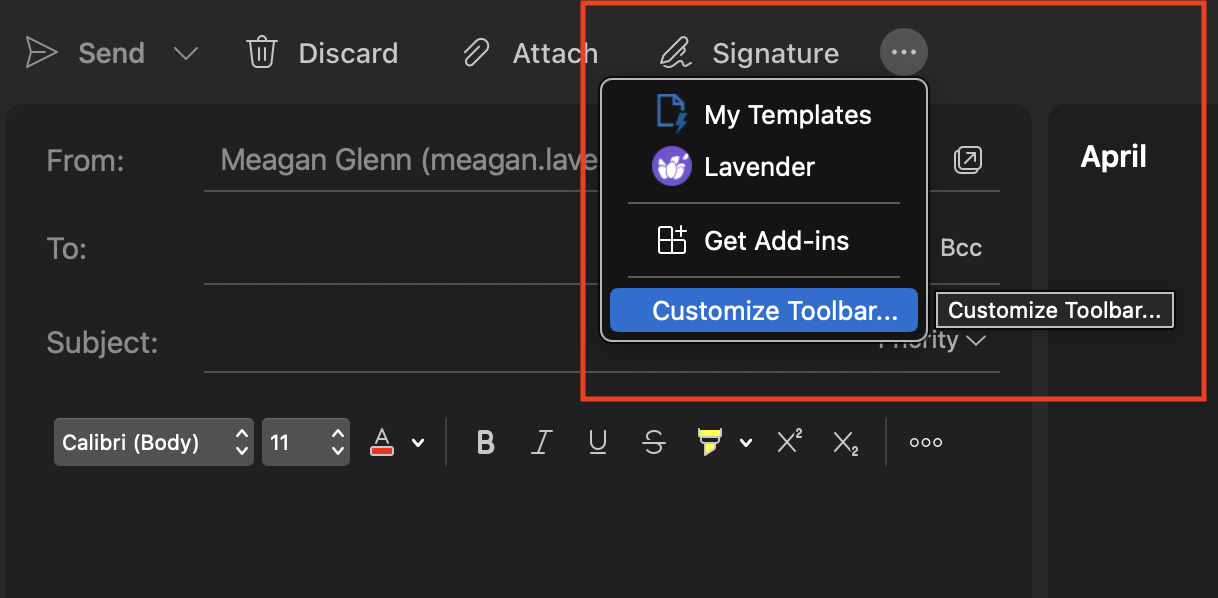
Next drag and drop the Lavender add-in!
Затем перетащите надстройку Lavender!
All done! Now you can start using Lavender with your email. 🎉
Готово! Теперь вы можете использовать Lavender в своей почте. 🎉
Uninstalling the Add In
Удаление надстройки
If you need to install a new version of Lavender for Outlook, or uninstall, follow these steps. Reference screenshots above, if needed!
Если вам нужно установить новую версию Lavender для Outlook или удалить её, выполните следующие шаги. При необходимости сверяйтесь со скриншотами выше!
Step 1: Head to Get Add Ins
Шаг 1: Перейдите в Get Add Ins
Step 2: Click my add-ins
Шаг 2: Нажмите my add-ins
Step 3: Scroll to Custom add-ins
Шаг 3: Прокрутите до Custom add-ins
Step 4: Click the 3 dots
Шаг 4: Нажмите на 3 точки
Step 5: click remove
Шаг 5: нажмите remove
Outlook file 👇
Файл для Outlook 👇
This file will work for New Outlook only
Этот файл работает только с New Outlook
About the Author
Об авторе